
テスト用の商品を登録する(Stripe)
Stripeの管理画面でテスト用の商品を登録します。まずは、管理画面でテスト環境の設定をONに切り替えることをお忘れなく!

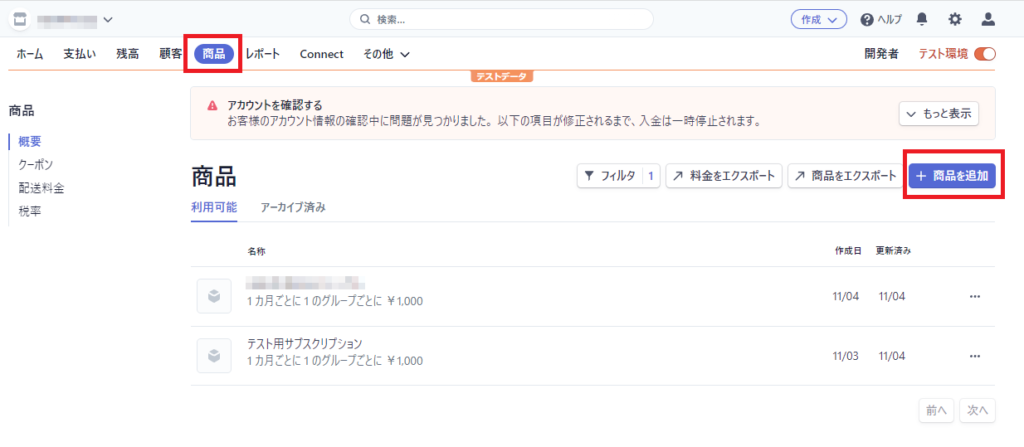
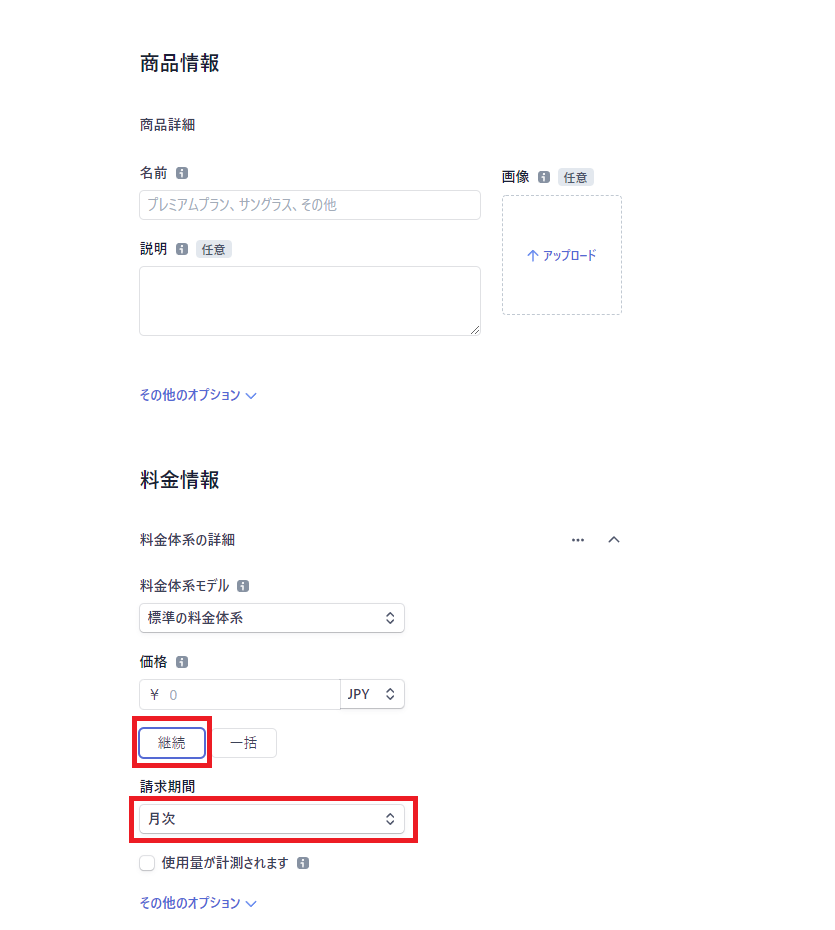
次に「商品」メニューから、商品追加をおこないます。サブスクリプションの商品なので、価格設定を「継続」にし、請求期間を設定しましょう。ここでは「月次」で設定します。
StripeAPIライブラリを追加する(Wordpress)
デフォルトのCheckoutスニペットでは対応できない情報も付与するため、phpのAPIライブラリを使います。ライブラリ公式のドキュメントはこちら。
composerが使えない、設定がめんどくさい場合はこちらのGitHubからソースコードをダウンロードしましょう。

ダウンロードしたファイルを、適当な場所に置きinit.phpを読み込めばAPIが使えるようになります。
require_once(dirname(__FILE__) . '/lib/stripe-php-7.100.0/init.php');Checkout用のJavascriptコードを出力(Wordpress)
サブスクリプション登録画面用のCheckoutのJavascriptを追加します。クーポンと税率設定、内部セッション用の一時キー付与してStripeAPIでセッションを作成します。
add_action( 'wp_footer', 'custom_footer_script');
function custom_footer_script() {
// TODO:※購入画面のみ出力するようにslug等でチェックしてください。
if (!is_user_logged_in())
{
return;
}
// API公開鍵
$pub_key = 'pk_test_XXXXXXXXXX';
// APIシークレットキー
$sec_key = '';
// 申し込み完了URL
$success_url = '';
// キャンセルURL
$cancel_url = '';
// 商品情報ID
$product_api_id = 'price_XXXXXXXXXX';
// 税別設定ID
$tax_rate_id = 'txr_XXXXXXXXXX';
// クーポンID
$product_coupon_id = 'promo_XXXXXXXXXX';
// カレントユーザーの情報を取得
$user = wp_get_current_user();
$user_id = $user->ID;
$email = $user->user_email;
// 内部セッション管理用ID
$reference_id = md5(uniqid(mt_rand(), true));
// メタデータに保存
update_user_meta($user_id, 'reference_id', $reference_id);
\Stripe\Stripe::setApiKey($sec_key);
// セッション作成
$session = \Stripe\Checkout\Session::create([
'success_url' => $success_url,
'cancel_url' => $cancel_url,
'payment_method_types' => ['card'],
'mode' => 'subscription',
'customer_email' => $email,
'client_reference_id' => $reference_id,
'line_items' => [[
'price' => $product_api_id,
'quantity' => 1,
'tax_rates' => [$tax_rate_id],
]],
'discounts' => [[
'promotion_code' => $product_coupon_id,
]],
]);
$id = $session['id'];
$footer_script = <<<EOM
<!-- Load Stripe.js on your website. -->
<script src="https://js.stripe.com/v3"></script>
<script>
(function() {
var stripe = Stripe('{$pub_key}');
var checkoutButton = document.getElementById('checkout-button-{$product_api_id}');
checkoutButton.addEventListener('click', function () {
stripe.redirectToCheckout({
sessionId: '{$id}'
})
.then(function (result) {
if (result.error) {
var displayError = document.getElementById('error-message');
displayError.textContent = result.error.message;
}
});
});
})();
</script>
EOM;
echo $footer_script;
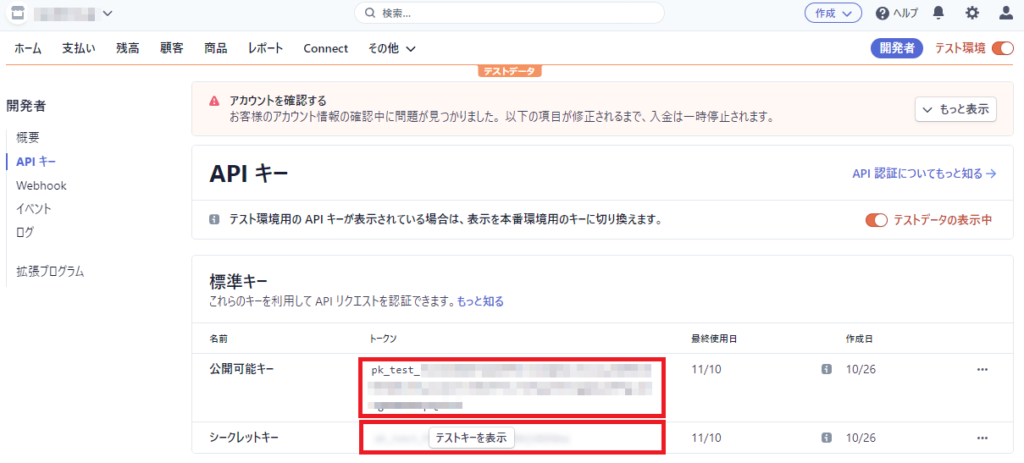
}API公開鍵とシークレットキーは、右上の開発者メニューから「APIキー」にて確認できます。
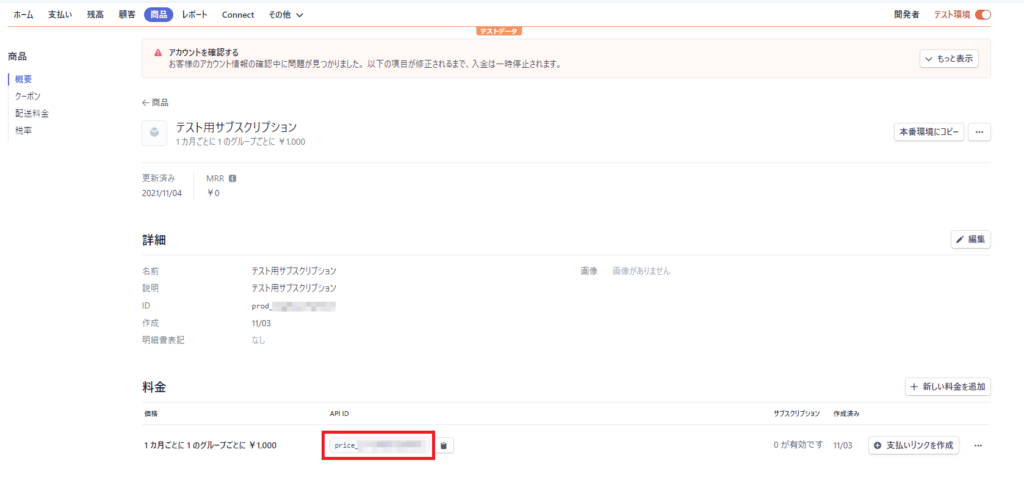
商品情報IDは料金設定のAPI IDを指定します
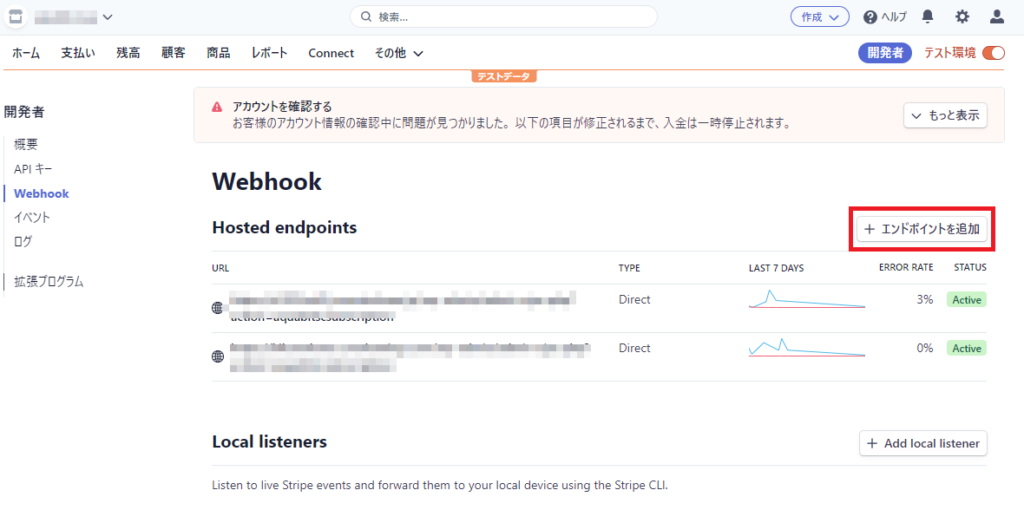
Stripeでエンドポイントを設定する(Stripe)
stripe管理画面で「開発者」メニューからエンドポイントを追加します。
| エンドポイントURL | https://ドメイン/wp-admin/admin-ajax.php?action=subscription |
| 追加イベント | checkout.session.completed customer.subscription.created customer.subscription.deleted invoice.paid |
通知用のWebhookを追加する(Wordpress)
Stripeからの通知を受け取るためにWebhookを設定します。
add_action( 'wp_ajax_subscription', 'custom_subscription');
add_action( 'wp_ajax_nopriv_subscription', 'custom_subscription');
function custom_subscription() {
	// エンドポイントのシークレットキー
	$endpoint_secret = '';

	$payload = @file_get_contents('php://input');
	$sig_header = $_SERVER['HTTP_STRIPE_SIGNATURE'];
	$event = null;

	try {
	  $event = \Stripe\Webhook::constructEvent(
	    $payload, $sig_header, $endpoint_secret
	  );
	} catch(\UnexpectedValueException $e) {
	  // Invalid payload
	  http_response_code(400);
	  exit();
	} catch(\Stripe\Exception\SignatureVerificationException $e) {
	  // Invalid signature
	  http_response_code(400);
	  exit();
	}

	// Handle the event
	echo 'Received unknown event type ' . $event->type;

	if ($event->type == 'checkout.session.completed') {
		// セッション完了
		// セッションのチェック $session->client_reference_id
		// サブスクリプションデータの保存 $session->subscription
	}
	if ($event->type == 'customer.subscription.created') {
		// サブスクリプション登録通知
		// ステータス更新など
	}
	if ($event->type == 'customer.subscription.deleted') {
		// サブスクリプション削除
		// 解約処理・ステータス更新など
	}
	if ($event->type == 'invoice.paid') {
		// 支払い完了
		// 権限・期限・ステータス更新など
	}

	http_response_code(200);
}
以上でWordpressでサブスクリプションの実装ができます。サブスクリプション登録・更新の処理などはそれぞれの仕様にあわせて実装してください。


コメント